Great to see you back for part three of our Beginner Saxophone Quickstart course.
In this lesson we are going to learn the first notes on alto saxophone.
Beginner Quickstart so far
Just a reminder, in part one, we talked about how to set up our saxophone – our reed, our mouthpiece, and our neck strap.
In part two, we learned how to start notes clearly with our tongue, and we learned our first song.
But today’s lesson is part three for alto sax. We’re going to learn the first six notes and another great tune.
So if you haven’t watched the first two parts in this series yet, go check them out first, and then let’s get stuck in with part three.
So grab your saxophone and let’s work through this together.
For tenor sax players
Hey, if you’re a tenor player though, check out part three for tenor sax, which is the same for soprano.
Your Left Hand
We’re going to start by talking about where our left hand goes.
Now we know where our thumbs go from the last lesson.
So our left thumb goes on the button at the back.

And our right thumb goes under the hook at the bottom on the back of the alto saxophone. That’s the same with every other saxophone.
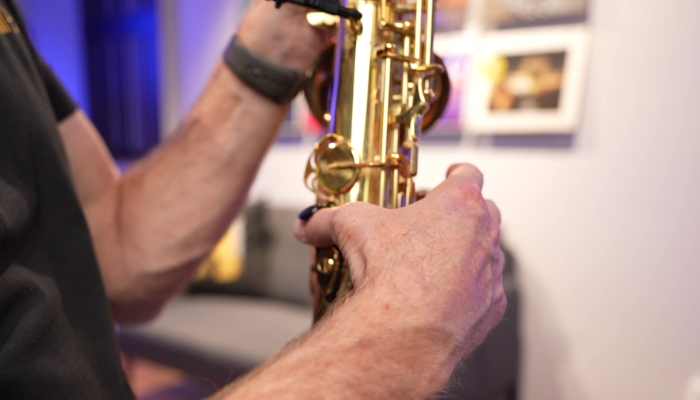
But let’s talk about where our first finger goes – our index finger. ,
Now, everyone’s saxophone is a little bit different here. But If you look at the front of your saxophone you can see that I’ve got this interesting spatula-shaped key at the front.
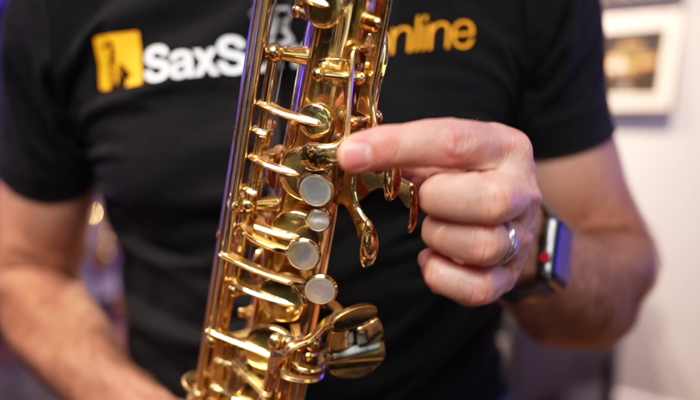
Now, we’re not going to use that key first today.
First notes on alto saxophone: How to play B
Instead, we’re going to use the key below it for our index finger. So, try popping your finger down on that, and that is the note B. Listen to what note B sounds like.

So why don’t you have a go at playing that yourself.
Remember, get that ‘voo’ shape with your mouth. And then always start with your tongue on the reed, release it, and let that air flow out to get a lovely clean start.
How to play A
So the second finger goes on the next pearl just below that one, and that’s the note A. So we’ve got two fingers down for A. Listen to how A sounds.

How to play G on alto sax
Okay, the third finger, you guessed it, – it goes on the next pearl straight below that. Three fingers down is the note G.

So we’ve learned 3 of our first notes on alto sax – B, A and G. That was a piece of cake!
Let’s move on to the right hand.
What’s inside Sax School PRO
You know, it’s fun to learn a song like we’re going to in the lesson today.
But imagine if you had access to a thousand lessons and hundreds of other songs.
What if you had access to live-stream sessions with a tutor when you can ask questions and get help. I mean, that’s an amazing thing.
And all of that is what’s included inside Sax School. Now, as I’m filming this, we have got a 14-day trial running. We’re helping thousands of students every single day. Come and check out what we’re doing with a 14 day free trial.
Your right hand
So the right hand is much easier because we’ve only got three pearls down there. Remember, when we stick any fingers down with our right hand, we must have our left three fingers down first.
So always have your left three fingers down when we add any of the fingers on the right hand.
How to play F
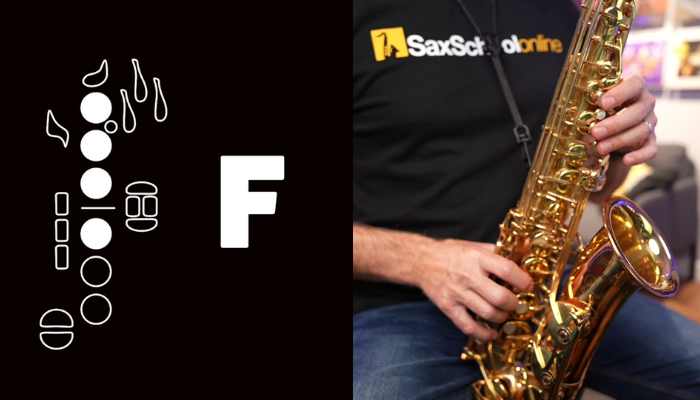
The first finger, of course, goes on the first pearl. Now that’s the note F. Listen to how F sounds.
How to play E
If you add your second finger, you’re going to get the note E.

The Note D
Add your 3rd finger down, and you get the note D.

Both Hands
I want to tell you a little bit about the way these notes work.
But let’s start by playing all of those first notes on alto saxophone, one after the other.
So we’re going to start with our 1st finger down on the left hand – B. And we’re going to work our way down to the note D. Are you ready? Here we go.
How your saxophone works
Let’s take a minute to talk about the science behind how instruments work.
We all know that bigger instruments, like the baritone saxophone, for example, are low. They sound low. Big instruments sound low.

Whereas tiny instruments, like this little piccolo, sound super high.

So it’s the same when we’re learning our first notes on alto saxophone.
Because as we are adding fingers on, we are making the tube longer.
So it’s important to remember that we don’t put down our right hand without having our left hand down first. And that rule goes through everything you play on the saxophone.
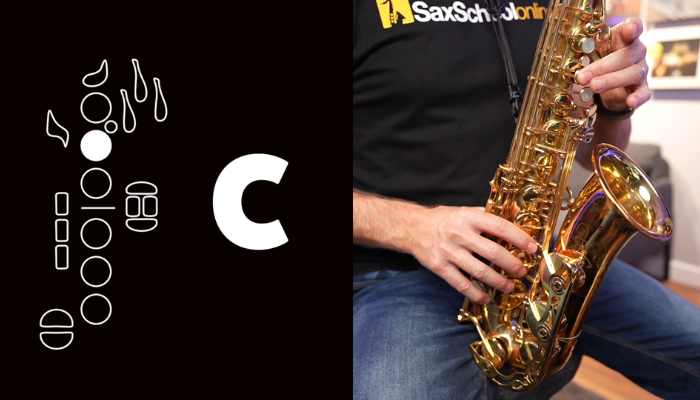
The Middle C
But of course, like with every rule, there is an exception, and that’s the note C. That’a one more note that I’d like to show you today.
So, the note C is played with the middle finger of our left hand, and only that note. Listen to how C sounds.
So now we we have learned our first notes on alto saxophone: B, A, G, F, E, D, and C. Oh, and the C sharp that we learned in the last lesson. Man, we’re romping through this!
How Music Works
In music, we use the first seven letters of the alphabet – A down to G.
A, B, C, D, E, F, and G. But in music, when we get to G, we go back to A, and it goes around and around forever.
An easier way to think of this is that as we go up the letters in the alphabet, we go up in pitch, so it gets higher. A, B, C, D, E, F, G, A.

And after we get to G, we go back to A again, and we keep going up A to G again, and A to G again.
It also works the same in the other direction. So if you know your alphabet backwards, you’re going down lower in pitch. So if we start on A again and go back to G, A down to G, F, E, D, C, B, A, G, F, E, D. Keep going all the way down.

So now you understand all this, let’s take the six notes that we’ve learned and put them into a piece.
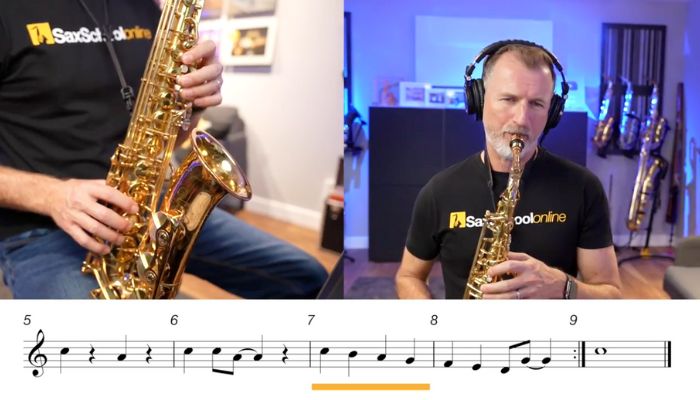
Learn a Song: ‘Walking Home’
So I’ve written a fun little song for us to learn today, and it’s called Walking Home.
We’re going to start on the note C that we’ve just learned.
The other thing that’s cool about this song is that, like the song we learned in the last lesson, there are some repeated sections.
Listen to the first two-bar section, which is repeated.

So let’s learn those notes. Now we’re going to start on the note we’ve just learned, which is the note C, our middle finger with our left hand. So we’re going to go C, down to A, which is two fingers. Then back to C, and then C, A.
So in tempo, it sounds like this, 1, 2, 3, 4. C, A, C, C, A.
Let’s try playing this slowly.
Now let’s put the backing track on and play it in time with the music now.
Brilliant! So we do that two-bar phrase three times, and then for the fourth time through we’ve got a brand new line, and that sounds like this.
Okay, let’s look at what’s happening with those notes.
Now we get a chance here to use every note that we’ve learned today.
So we start on the note C, and we run down. We go C, B, A, G, F, E, D, G.
And that last bit there we go from D, up to G. So all we have to do is lift our right hand off, to go from the D fingers, up to the G fingers.
So let’s try that very, very slowly.
Now let’s try playing just those two bars with the backing track.
So there’s just one note left and that’s the very last note, where we play a nice long C.
Putting it together
Now we’ve learned the entire song. So I’m going to put the entire backing track on and let’s play through the whole thing together.
Now don’t forget you can use the speed controls on the lesson here to slow it down if you need to.
So just go over it as many times as you need until you feel comfortable.
Pro Tips

Remember:
- Start every note with your tongue
- Breathe deeply
- Try and keep your fingers as close to those keys as possible.
I’m lifting my fingers off the keys so I can show you very easily which notes I’m playing. But when I’m practising for myself, I try and keep my fingers close to the keys. And you should too.
Okay, let’s go play through with the backing track.
Next Steps
Hey, that was awesome! Well done for learning your first notes on alto saxophone.
Now, the next step is to unlock the whole range on the saxophone. There’s a whole bunch more notes that you can play, and it’s easy to get them out.
I’m going to show you that in the next lesson. Plus I’m going to show you another song that’ll get your fingers going and make you comfortable on the saxophone, particularly with this next important transition.
So, keep practising hard, don’t forget to use this lesson as much as you need. I’ll catch you when you’re ready for the next lesson.
Here’s where to find the whole Beginner Saxophone Quickstart Course
Getting Started:
Lessons Alto Sax:
Part 2 Tonguing for alto
Part 3 First 6 notes on alto
Part 4 Your second octave on alto
Lessons Tenor Sax:
Part 2 Tonguing for tenor
Part 3 First 6 notes on tenor
Part 4 Your second octave on tenor