
Whether you’re just getting started as a sax player, or coming back after a big break, this course is the perfect place to start.
Whether you are a beginner saxophone player or a returning player, this mini course from Sax School Online will help you go from your first notes, right through to your first songs. And you’ll learn a bunch of skills along the way.
14 Day FREE Trial | Sax School PRO
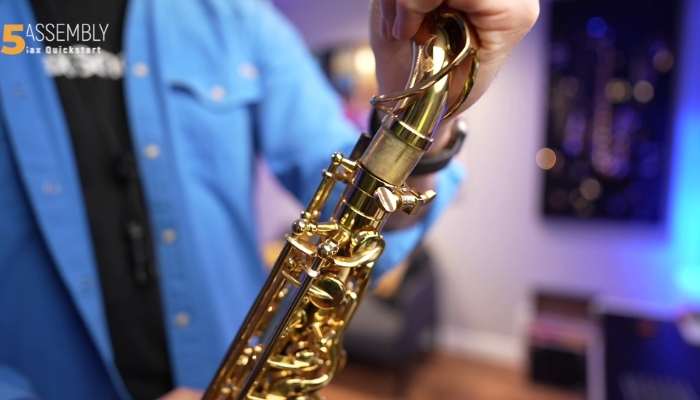
Getting set up
In this first part of the course, we are going to be talking about how to set up your mouthpiece and your reed, and assemble your saxophone so you can start to make your very first sounds.
Now, I’m going to show you the alto saxophone today, but you could also use this lesson whether you’re starting on tenor, soprano, or baritone.
And by the way, most of us start on alto or tenor as adult beginner saxophone learners. but if you’re unsure about which one, check out this blog where I help you choose between alto and tenor saxophone.
Setting up your mouthpiece
Now, we’ve all got different ways that we like to assemble our saxophone. Often I’ll have my whole saxophone assembled while I’m getting my reed out, and then I’ll put my reed on my saxophone.
But for today, what I’d like you to do is to grab your neck and your mouthpiece. I’m playing an alto saxophone, so of course I’ve got an alto saxophone mouthpiece. You’ve probably got a mouthpiece that came with your saxophone. But if you’re going out to buy a new mouthpiece, make sure you choose the right one that suits your particular saxophone.
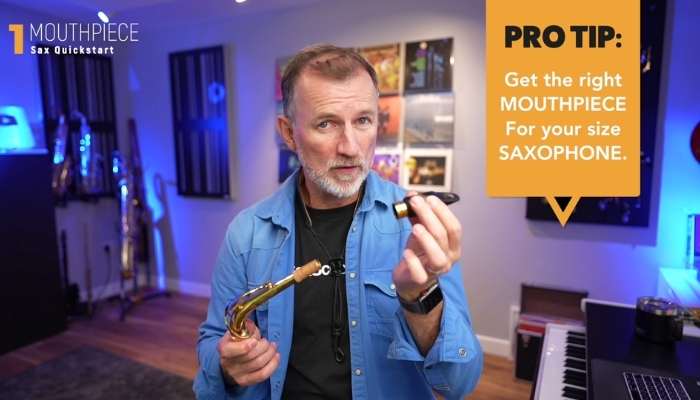
Okay, so I’ve got my neck and I’ve got my mouthpiece. And the very first step is to put these two things together. And it should be an easy twist.
So, if you’re struggling to get your mouthpiece easily onto your neck, try applying some cork grease. That should make it easier. You should always put cork grease on every couple of weeks, to make sure that your cork doesn’t dry out.

But if you’re still struggling to get that mouthpiece on, then just pop back to your retailer or go see a repairer. They can adjust that cork. It’s a dead easy process and it’s a very common problem if you’ve changed to a new mouthpiece.
Now, it’s important to get your mouthpiece lined up properly on the neck.
Hold your neck so that you can see the rib on the underside of the neck. The flat side of the mouthpiece should be perfectly in line with that. And we should have about a centimetre of cork showing beyond the mouthpiece.

Okay, let’s move on to the next step.
Set up your Ligature
So, the second piece of equipment we need is a ligature. Now, ligatures come in lots of different styles and shapes.
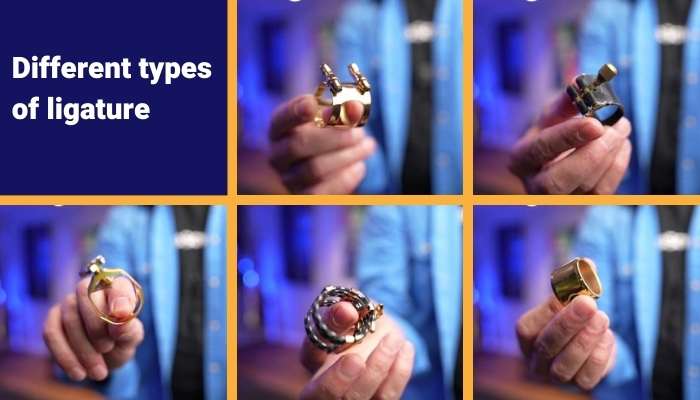
Every ligature does the same job, which is just to hold the reed in place.
For now, just try popping your ligature on your mouthpiece, so you know which way around it goes. For me, I’ve got this two-screw ligature, which is the most standard style. And the screws face the same side as the flat side of the mouthpiece.

However, with the single screw ligature, the screw is at the top. Okay, let’s move on to reeds.
About reeds
Reeds come in different brands, they come in different sizes and even in different materials.
Here is a synthetic reed, alongside a traditional cane reed.

As a beginner saxophone player, I would suggest that you start with a cane reed.
But, of course, you need to get the correct reed for the type of saxophone that you’re playing. I’m on an alto saxophone so I’m using an alto saxophone reed.
Now, reeds come in different sizes, and the sizes refer to the thickness of the reed. The higher the size, the harder it is to play.
For an adult beginner saxophone player, I’d suggest starting with a size 2 reed. But you could also choose a 1.5 reed. Most players, though, eventually move up to a 2.5 reed, or maybe even a size 3 reed. It depends on your mouthpiece and your physiology. So I’ve been playing for 40 years, and I still play on a size 2.5 reed. Because for me, that suits me, with the mouthpiece that I like to play.

14 Day FREE Trial | Sax School PRO
So just be aware that whatever size you start at, whether that’s 1.5 or 2, as your mouth muscles get stronger, you’ll probably move up one or two sizes.
Let’s look at how we fit the reed onto a mouthpiece.
About the reed
So the way the reed works is it makes a seal on the mouthpiece, and it vibrates as we blow across it. So it’s important to get that seal working well.
And for that reason, we must make sure that the reed is wet. Okay, this is the thing that most beginner saxophone players think is a bit disgusting.
We have to have a lick of our reed. I’ll generally have it in my mouth while I’m setting my saxophone up – for about 15 seconds. But it is important to get it wet. And also at the back of the reed, so everywhere on the bottom. That’s the disgusting part out of the way and the reed is nice and wet.

Fitting the reed to the mouthpiece
Let’s talk about how we fit this onto our mouthpiece.
Now the important thing here is that the reed is fragile at the tip. But the heel is the strongest part. And it’s got a flat side which goes to the flat side of the mouthpiece.
So I’m right-handed, so I normally would hold my mouthpiece with my left hand and slide the ligature forward, making sure that the screws are nice and loose.
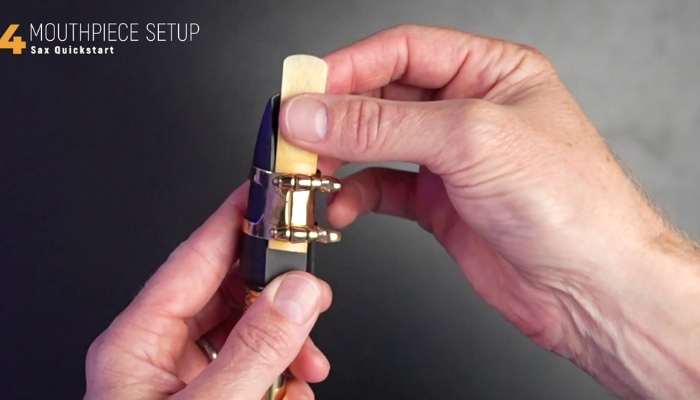
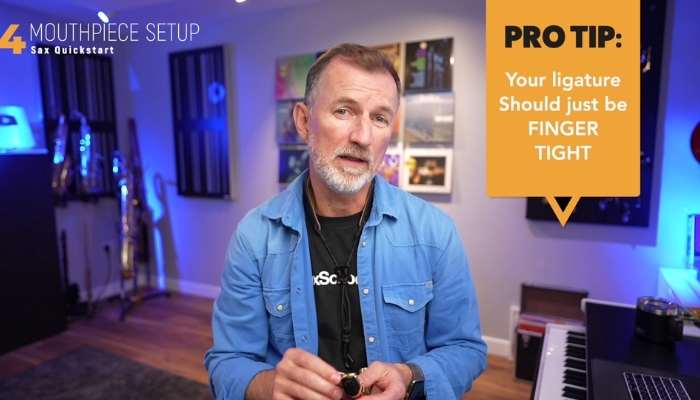
Then I slide the reed in, the thick end first, and line it up even on both sides. It should be just a whisker below the top of the mouthpiece. And then I tighten the screws, just finger tight. Now you mustn’t over-tighten your ligature. The ligature just has to hold the reed in place so that it doesn’t move, and that way it can vibrate freely.
When you’re new to putting your reed on, you might find you need to fiddle with it a little bit to get it right. But it should look nice and neat. Every time you do that, it’s going to get much easier.
Let’s put the saxophone together and start making some sounds.
Putting the neck on the sax
Gently twist the neck to fit it into the top of our saxophone body.
We need to make sure that the rib that I mentioned before is in line with this key at the back here. And then we gently tighten the screw at the top of our saxophone. Just like with our ligature, it doesn’t need to be super-tight. It should just be fingeritight so that the neck doesn’t move.
About Neck straps
Now we haven’t spoken about this yet, but this is a neck strap. You should have one in your saxophone case, and this is important. So find your neck strap, and pop it over your neck.
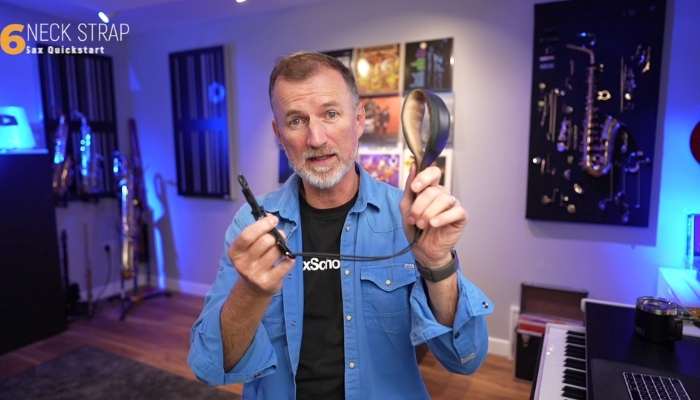
So the neck strap is super-important because it supports all the weight of the saxophone when we’re playing. That way we can avoid having any extra tension in our arms.
So the hook at the end of your neck strap should go into the ring at the back of your saxophone.
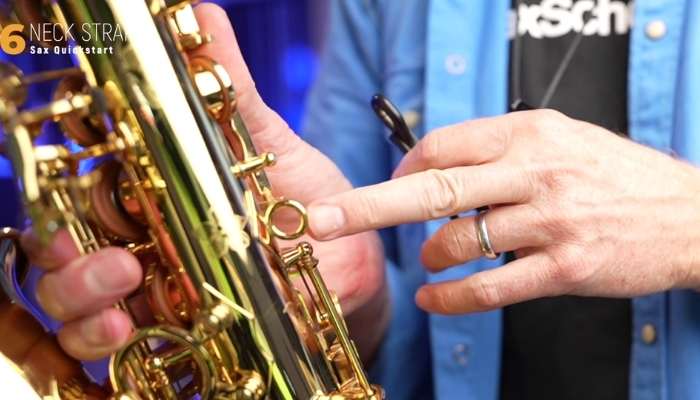
The Right Posture
So let’s talk quickly about posture. Whether you’re sitting or standing to play your sax, the neck strap must be adjusted so that the mouthpiece can easily go straight into your mouth. You don’t want to move your head up and down to reach that mouthpiece.
You want it to be comfortable. So to position your hands, take your right thumb, and stick it under the hook at the back of your saxophone. And take your left thumb and stick that on the button at the top back of your saxophone. There’s no need to push down any buttons for now.

Let’s talk about your embouchure.
Why embouchure is important
So in the saxophone world, your embouchure is your mouth. It’s your mouth muscles and your mouth shape.
And that’s super important because that’s the thing that helps us to get the sound that we love on saxophone.
Now, just like if you were starting a new sport, you need to build up your skills and you need to build up your strength.
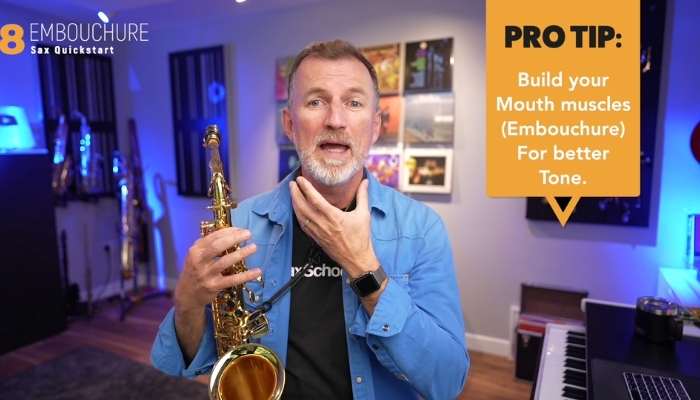
Well, it’s the same when you are a beginner saxophone player. Our mouth muscles need to build up and get stronger and have more stamina, the more that we play.
So we must take our time to build those muscles gradually.
The correct mouth shape
But the first step is getting a great shape of your mouth so that we can support that reed.
Now I mentioned the reed vibrating. So we need to make a little cushion for that reed to sit on, so that it can vibrate easily. And the way we do that is with our bottom lip.
There are a million different things on YouTube that will tell you one way or the other about how to shape your mouth. It can get confusing.
Let me show you the way that I’ve taught our thousands of beginner saxophone students inside Sax School.
So, let’s start by saying VOO.

14 Day FREE Trial | Sax School PRO
When you make that sound, a couple of important things happen. First of all, we get that round shape, OO. And secondly, the VOO bunches up your bottom lip.
So try saying voo and then slide your mouthpiece into your mouth.
Can you feel that bunched-up lip that the reed rests on?
Now stick your top teeth on top of the mouthpiece. This is important. Then make a seal around the mouthpiece like a drawstring bag. So you’re making a round seal around the mouthpiece. So voo. Top teeth on, drawstring.

Okay, that’s the perfect shape for saxophone.
I have one last thing to tell you, and that’s how much mouthpiece to put in your mouth.
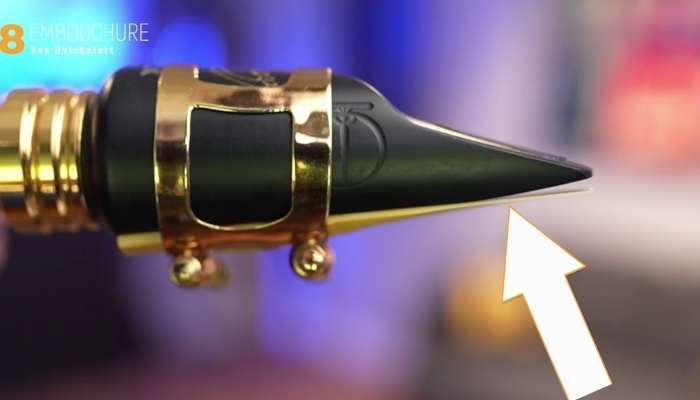
If you look across the mouthpiece, there’s a point where the reed comes away from the mouthpiece, and that’s where your lips should be.
Make the longest sound you can!
Okay, take a big breath, and let’s make the longest sound that we can.
Next steps
We’ve made some great progress there. Now, go and check out these beginner saxophone lessons below to learn your first notes and your first song.
Next lessons Alto Sax:
Part 2 Tonguing for alto
Part 3 First 6 notes on alto
Part 4 Your second octave on alto
Next lessons Tenor Sax:
Part 2 Tonguing for tenor
Part 3 First 6 notes on tenor
Part 4 Your second octave on tenor
And if you’re ready to start making real progress on saxophone, take a look at Sax School PRO with a 14 day free trial.
14 Day FREE Trial | Sax School PRO