
There’s one super important key that takes us from the lower register on the sax to the upper register on tenor saxophone.
Learn about your tenor sax octave key in this lesson – part four of our Beginner Saxophone Quickstart Course. Plus we’ll be learning a little tune that will help us put it all into action.
What we’ve learned so far
Just a quick reminder though of what we’ve learned so far in our Beginner Saxophone Quickstart Course for tenor saxophone:
- in part 1 we talked about assembling the instrument, the mouthpiece and the reed
- in part 2 we talked about tonguing and we learned our first song
- in part 3, the last lesson, we learned a whole load of notes on our saxophones and a cool little tune.
So that brings us to part four.
This lesson is for about the tenor sax octave key. So if you’re an alto player or a bari player, go check out the lesson for that here.
What is the Tenor sax octave key?
So the key that takes us from the low register to the upper register is on the back of our saxophone above our left thumb. It’s called the octave key.

Now the octave key is super important. It’s weird though using our thumb to activate this key. So we must do it in the right way.
First get your thumb in the right position, as we learned back in the first lesson.
So you should have with just the heel of your thumb sat on the button at the back of the saxophone. And you should have the tip of your thumb resting on the top of the octave key.
And then, to push the key in, all we want to do is the smallest movement just with the tip of our thumb.
Pro Tip
We need to avoid moving our hands too much.
So if you find that your whole hand and your wrist and even your arm are moving when you go up to push that octave key down, you’re doing the wrong thing. So just keep that movement as small as possible—just the tip of your thumb.
What is an octave?
If you haven’t heard the term octave before, it simply means the same note but eight notes above.

Do you remember in the last lesson we spoke about how in music we use the first seven letters of the alphabet?
And when you go from A through to G, the next note above is A again. So A B C D E F G A.
So the distance between those two As is an octave. And on the saxophone we’ve got two and a half octaves to play around with in the standard range.
So, let’s now dig into how we can start to use the octave on the saxophone.
How to use the tenor sax octave key
So let’s put the octave key into action with a note, and we’re going to use it with note D.
So do you remember we learned the note D in the previous lesson?
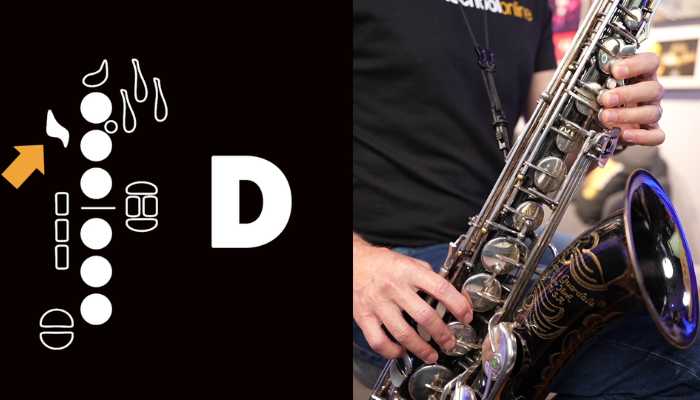
So D is six fingers, so with our left hand, one, two, and three. With our right hand, 1, 2, and 3.
And we’re also going to add that octave key on the back of our saxophone. So you want all those fingers and your thumb pressed down.
Listen to how octave D, which is called middle D, should sound.
So have a go at that now and see if you can get that sound out too.
But make sure all of your left-hand keys are down and your right-hand keys as well as that octave key. And then our shoulders are relaxed, our arms are nice and relaxed, and we’re feeling groovy. Right, here we go.
Transition from Middle D to C
Now the trickiest thing about using the octave key is the transition from the upper octave, which we’re in now, with middle D, back to the lower octave.
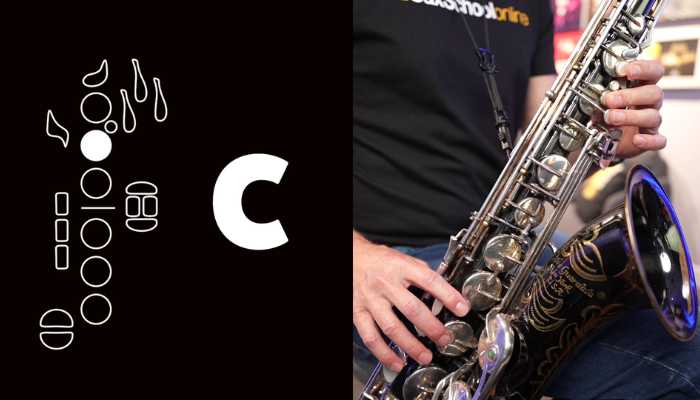
So the note directly below D is C. And if you remember, C is played just with the middle finger of your left hand. It sounds like this.
So you can see there are lots of fingers that move when we go between C and octave D.
Let’s first of all just try that finger movement and see if we can get it as smooth as possible.
So with C, we’ve just got our middle finger on with our left hand.
Then we need to add all six fingers down plus our octave key.
So let’s start with C and then move your fingers to D. And then back to C, and then back to D.
Smooth finger movement
Now when you move from C to D, you’ve got to make sure that all of your fingers are moving together like one movement. Think about that right hand, and make sure that all three of those fingers are moving together.
Let’s try playing this now. We’re going to go super slow. I’d like you to start every note with your tongue.
And we’re going to start with a C, and then we’re going to move to D, and just go backwards and forth a couple of times. Here we go.
Check your fingers
So if you’re getting any little flippy floppy notes in between, that means your fingers aren’t moving together.
You could check yourself in a mirror, just to see what’s happening with your fingers.
And one other thing to think about is keeping those fingers as close to your keys as possible. That just makes it more efficient.
Use the octave key in a song
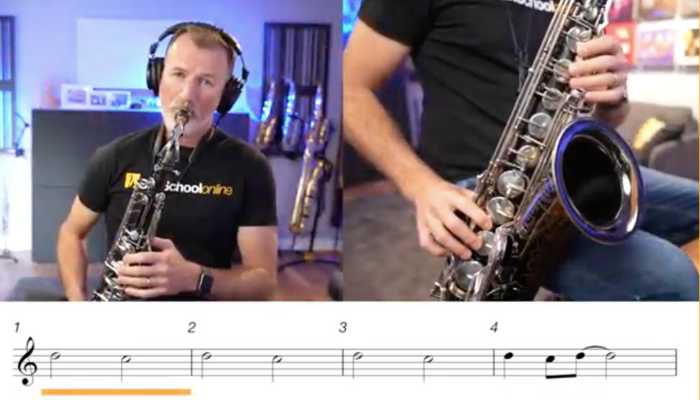
Okay, now we know that movement, let’s put that into action with a song. And I’ve written a fun little song for this lesson called ‘Dee Cee Blues’. Yeah – not too imaginative with the name. And also it’s not technically a blues, it’s more of a Latin thing – but it doesn’t matter! It’s fun!
So, this song is easy because it uses the same phrase that’s repeated two times. So I’m going to play the phrase with the backing track now, and then we’re going to get stuck in and learn how to play it together.
Listen to what it sounds like.
Okay, so I told you it was pretty easy. Let’s learn the notes.
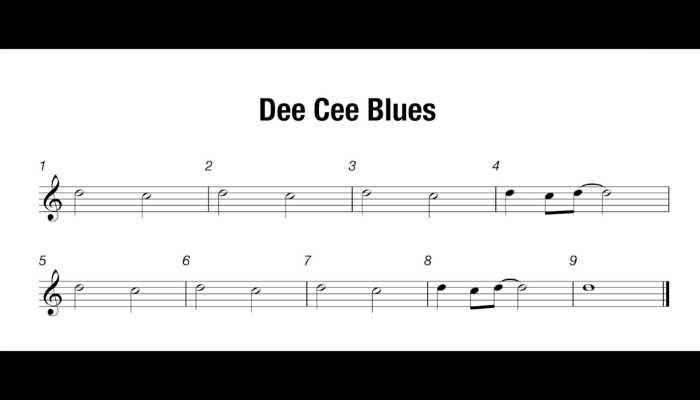
So, we’re going to start on the note D. Remember, we’ve got all six fingers down and our thumb at the back.
We’re going to hold that D for two counts, and then we’re going to go to the note C for two counts.
Then back to D for two counts, then back to C for two counts.
And then up to D for a third time, and back to C for a third time.
The last bar goes like this – D, C, D. So let’s just try that movement together. D, C, D. Okay, so that’s the entire pattern.
Now let’s try just doing our fingers, but do it in time. Here we go. Grab your sax, and get your D fingers ready. Got that octave key on too? Here we go.
So if you need any extra time, just go back and have a look at that movement. Particularly check your right hand, and the coordination between the two hands when we go back down to C.
Practice with the Backing Track
But if you’re ready, let’s get stuck in and try playing this with the backing track now.
So we’re going to get four counts in, and then we can start playing with the backing track.
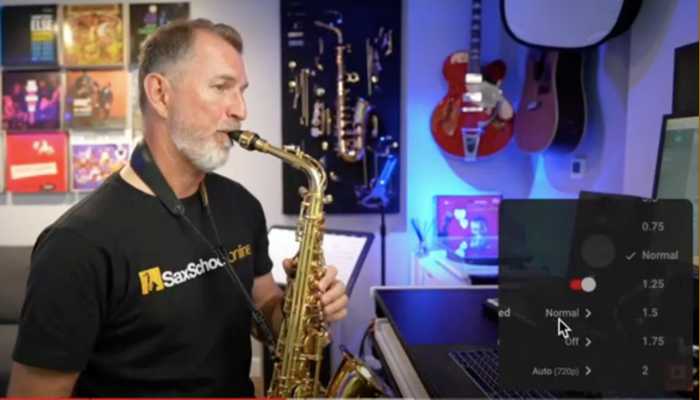
But don’t forget, if you need to, you can use the player controls to slow down the video just to make it a little bit easier.
Okay, let’s have a go.
Alright, awesome. Just two more quick things to tell you.
And the first is that that four-bar phrase we just played happens a second time.
Then, after that, the only other thing that happens in the song is the very last note. For us, that’s a nice long D. Okay, I think we’re ready to go with playing this song through with the backing track.
Let’s play it through together. Remember:
- Keep those fingers close to the keys
- Use your tongue to start the notes
- Breathe nice and deeply.
Let’s have some fun!
Next Steps
You should be super proud of yourself! Because, in just these 4 short videos, you’ve gone from learning how to put your mouthpiece together all the way through to learning 3 cool tunes and a bunch of skills that will set you up for learning amazing stuff on your saxophone.
What are you going to do now?
Because the next steps are important to you. You need to get the right courses, the right lessons, and the right support from great teachers to keep your momentum going.
And that’s what Sax School is all about. In the last 10 years we’ve helped tens of thousands of students.
Try Sax School Online
So if you’d like to find an easier way to get moving with your progress, Sax School can help you.
Maybe you want to learn jazz or pop or music for church or classical music. Or maybe you just want to learn for yourself so you can play at home for your family and friends. Sax School is going to help you to get there.
There are over a thousand lessons in there, organised into clear learning pathways and courses. Plus we’ve got a huge team of teachers now.

We hold live sessions every month where you can come along and get direct feedback from a teacher.
There’s everything you need to help you make fast progress, and that’s why our students do so well.
We’ve got a 14-day trial that’s running at the moment so give it a try.
And I’d love to see you in there and start helping you inside Sax School, and see what you’re able to do on your saxophone.
Now even if you’re still getting ready to get started with Sax School, please go check out all the other stuff on our YouTube Channel and on our blog. There’s so much that’s going to help you.
Okay, keep practising hard. I’ll catch you next time.