
Once you’ve learned your first few notes on the alto saxophone, it’s time to start learning your first cool melody.
If you’re a beginner alto sax player, you’re going to love this lesson. We’re going to learn a brilliant, simple tune I’ve written called Swingin’ Easy. It just uses four or five notes. It’s so easy to play, but it’s a whole lot of fun.
This lesson is actually from our Saxophone Toolkit from inside Sax School.
Just a heads up, though, I didn’t have my beard when I filmed this so I look like young Nigel!
Introducing the tune
Okay, let’s get started learning our very first beginner alto sax song. This is a fun little jazzy tune called Swingin’ Easy.
I’m going to show you all the notes for my tune ‘Swingin’ Easy’ on the alto saxophone.
If you’re a beginner tenor sax player then watch out for the tenor version of this lesson, coming soon.
First I’ll play it through with the backing track, so you can hear what it sounds like. And then we’ll go through and learn it in easy steps. Here we go.
Listen as I play the tune.
It seems quite long, but it’s so easy to learn.
There are only a couple of sections in this whole piece of music, so we’re going to get through this super-fast.
Holding your saxophone
As a beginner alto sax player, it’s important to get your posture right to avoid problems down the track. Here’s a quick reminder:
- you want to be nice and relaxed, with your shoulders relaxed.
- Your mouth and your neck strap must support the weight of the saxophone (not your thumb).
- If you’re sitting down, don’t have the saxophone resting on the seat.
- Instead, have a nice straight back
- Either have your sax between your legs, over to the side, or whatever feels comfortable for you.
Get the PDF sheet music for this tune from our Saxophone Toolkit.
First phrase notes (bars 1-2)
We’re going to start the very first note with three fingers down on the left hand, and that’s the note G.
And our first phrase goes like this: Rest, G, A, (which is two fingers), then up to B, (which is one finger) back down to G, (which is three fingers again), and back up to A, (which is two fingers).
So it goes like this – G, A, B, G, A.
Learning your first notes? Get our free beginner alto sax finger chart here.
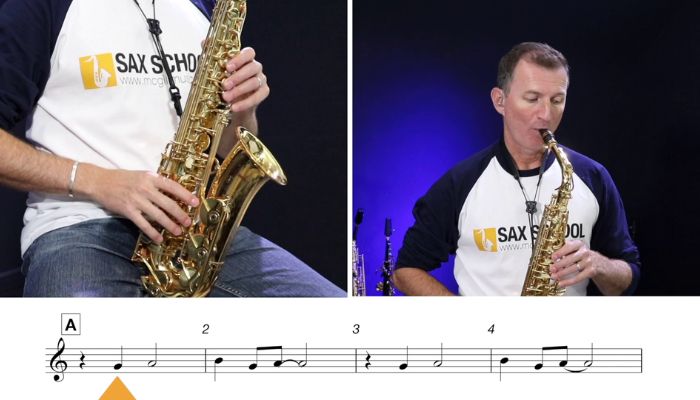
If you’ve got your saxophone with you, pick it up and try doing these fingers with me. So you’re not blowing, you’re just using your fingers. So – G, A, and then B, G, A. Let’s try it again – G, A, B, G, A.
Let’s try playing it through now.
Make a nice round embouchure, and use your lip to form a cushion over your bottom teeth.
Remember your top teeth must rest on the top of the mouthpiece.
Then make a seal with your lips around your mouthpiece.
We’re going to start every note with a “too”, and we’re going to use lots of air, so we’re breathing deep down in our abdomen.
And think about pushing your air out from here as if you’re coughing or a sit-up or a big poo! Push from your stomach muscles so everything here is very tight. Okay, here we go.
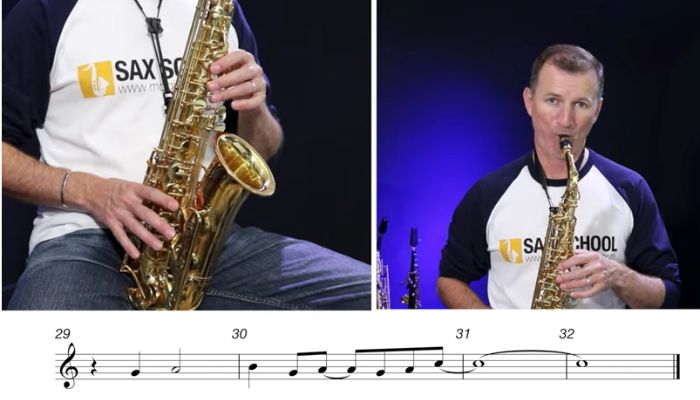
Notes bars 3-8
Okay, so we play that phrase in bars 1-2, then we repeat it in bars 3-4. You can see this in the music.
Then in bar 5, we play the same phrase again but this last time we finished by playing G A C. S0 that’s three fingers, up to two fingers, and then the C is just the middle finger.
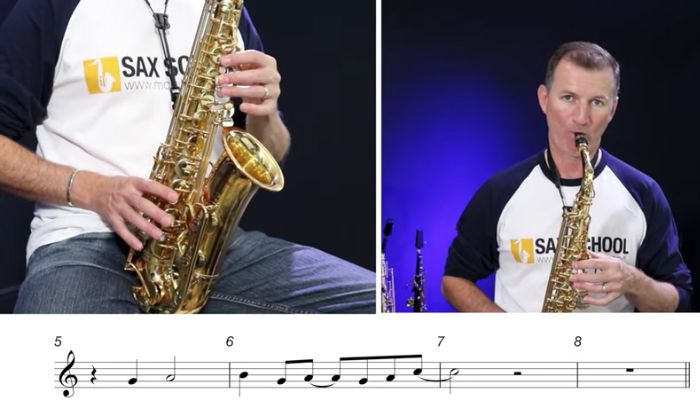
So let’s do that last phrase that ends with those G A C. So this is from bar 5 in your music.
Sound Tips
Now if you’re getting any strange sounds on your saxophone, if it’s getting squeaky or if it sounds raucous, then try using a little bit less mouthpiece. So pull your mouthpiece out of your mouth and put less of it in your mouth. And that will help the reed to be more controlled and sound a bit smoother.
And if you’re struggling to get any sound out of your saxophone at all, it probably means that you’re too tight in your embouchure (mouth muscles). So you need to relax it and let that reed vibrate. Don’t squeeze the death out of that mouthpiece!
Okay, let’s put together what we’ve learned so far.
So we’re starting at the beginning of our piece of music. Here we go.
We hold that last C for an extra couple of beats.
Awesome. Well done.
The good thing about this piece of music is it’s very repetitive. So we’ve already played 8 bars.
Reading music recap
The short sections between the vertical lines on the music are called “bars“. In this piece of music, we’ve got 4 bars on each line.
Notes bar 9-16
So if you look at bar 9 through to bar 16, that’s the same as bars 1 to 8.
So that means we get to do all of that again. So let’s do all of it for a second time.
So we’re playing from bar 9 in our music and it’s the same as what you’ve just learned.
Now this time I want you to think about keeping your fingers super close to those keys.
So I keep my fingers off the keys when I’m showing you in the lessons, so it’s easier for you to see.
But when I’m playing, my fingers are touching the keys all the time, and that’s the best way to go.
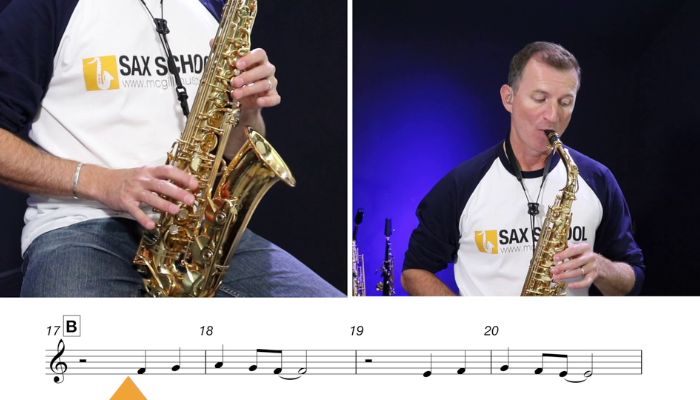
Notes bars 17-18
There’s one more quick section to learn. If you look at your music, this section is in Figure B (bar 17).
In this section, we’re going to add our right hand. We’re going to use the first finger of the right hand added to our left hand.
So we’ve got three fingers down with our left hand, and one finger with our right hand – this is to note F.
We’re going to rest for the first two beats. Then we play F up to G – so we’re taking that first finger off. And then up to A, and then back to the G. Then back to the F.
So it’s F, G, A, G, F.
Can we try playing that? Here we go.
Notes bars 19-20
The next two bars are the same, but this time we’re going to start with two fingers down on our right hand.
So it goes E, F, G, F, E. So two fingers, up to one finger, up to just the left hand and then back down again, F, E.
Try that section.
Notes bars 21-24

In this section, we’re going to add the third finger of our right hand to play a D.
So we have 2 beats rest, then play D, up to E, up to F sharp. This is a new note – we’ve got all of our left hand down and we’ve just got the middle finger of our right hand down.
So this section is D, E, F sharp and then back to D, E, F sharp, G up to A, and then up to B.
Let’s try playing that bit. It’s a bit tricky. Here we go, from bar 21 in your music.
Remember, keep your left hand down. And keep your embouchure nice and round with lots of support around the mouthpiece. Breathe deeply and don’t use too much mouthpiece.
Let’s do all of that second B section together. These are the last notes we need to know for the whole tune.
So we’re starting back to bar 17. We’re going to start with F, G, A, G, F. Here we go.
That’s the B section. Awesome.
Notes bars 25-28
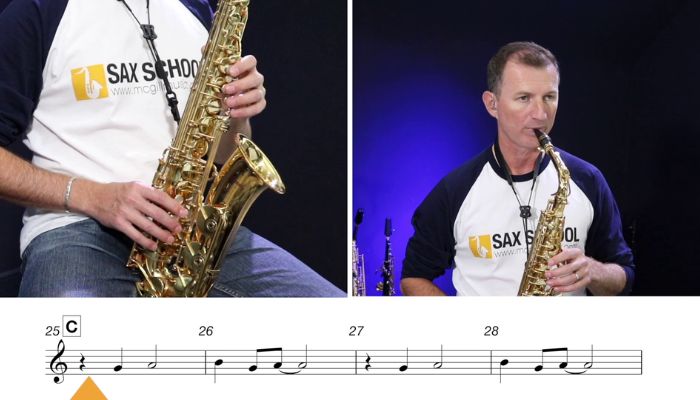
And the last section we’ve got to do on this tune is the C section. And that’s the same as in the first section we played – the A section!
So let’s play that C section, the same as the A section, just to finish off the tune.
And at the very end there we hold that C for an extra 8 counts, right to the end of the whole backing track. How does that sound? Brilliant.
Playing it through
So I’m going to put the track back on again and play it through for you with the backing track. But this time I’d like you to try playing along with me.
So remember:
- keep your fingers close to the keys
- think about breathing deeply
- think about having a round embouchure
- Start every note with a too, too, too.
- If it’s getting squeaky, use a bit less mouthpiece in your mouth. That’ll help to make the sound sweeter.
Are you ready? Here we go.
Wrapping Up
How’d you get on with that? It’s a great little tune, isn’t it?
Now, don’t forget that you can use beginner alto sax lessons as many times as you need to. It’s completely free.
And I’ve even included the backing track at the end of the lesson there. So you can use that to go back and practice as many times as you need to.
Now, this is just a starting point. You’ve learned your first song now. You’re going to want to crack on and learn a whole bunch of more techniques and a whole bunch more songs.
There are tons in Sax School to help you with that. We’ve got a complete Getting Started course and over a thousand other lessons and courses to dig into.
Now, there’s a 14-day free trial we’re running at the moment. There’s a link for that down below, so if you’re curious, go check it out.