Beginner saxophone player? Awesome. In this article, I’m going to walk you through how to get set up properly and how to play your first six saxophone notes, so you can start making some awesome tunes.
This lesson is for you, whichever sax you’re learning to play. Check out beginner saxophone lessons, especially for alto and tenor saxophone, in my Ultimate Saxophone Toolkit.
In this guide, you’ll learn:
- How to properly set up an alto and tenor saxophone
- Tips on how to play your first six saxophone notes to create awesome tunes
- Nigel McGill’s ultimate saxophone toolkit
Learn how to play your first notes on the saxophone, so you’re ready for some fun tunes.
The Right Start
I remember making my first sounds on the saxophone as a beginner saxophone player. It’s really exciting when you first start playing. But it’s so important that you get it right because if you get off in the wrong direction, it’s going to hold you back. And we don’t want that.
Over the last seven years, I’ve helped over 11,000 people now through Sax School to get started on saxophone. Loads of our members are now making albums or playing gigs, playing in bands, playing for community bands, or playing in their churches.
In this blog, I’m sharing one of the beginner saxophone lessons from my Ultimate Saxophone Toolkit. This is a free bundle of saxophone lessons for beginners that you can register for at the link below. This great lesson bundle follows on from learning these first few notes to playing some great fun tunes – so it’s perfect for beginner saxophone players. And it’s free – I don’t want you to miss out on that.
Your Saxophone Mouthpiece
So hopefully, you’ve got your saxophone. Firstly, grab your mouthpiece and your reed, and we’re going to quickly run through how to put this together.
So the sound on a saxophone is made by the mouthpiece, which goes on the very end of the instrument.
There are three elements: the mouthpiece, the reed, and the ligature.
Now there are lots of different options for reeds. I use synthetic reeds by Légère, but you must probably have a cane reed, which is a standard type of reed that everybody used up until recently. I just prefer these synthetic ones.
It’s really important that you get the mouthpiece assembled correctly to get a good sound.
Assembling the Mouthpiece
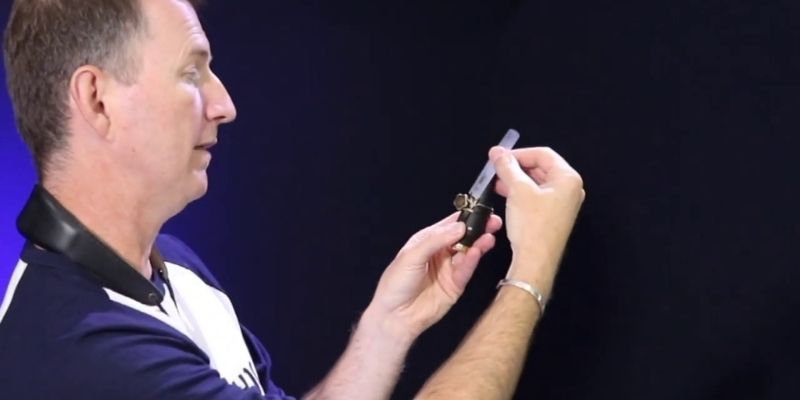
✅ Turn the flat side of the mouthpiece so it’s facing you.
✅ Wet the reed by putting the thin end in your mouth.
✅ Put your ligature on the mouthpiece. You should always put ligature on the mouthpiece first because it’s better for your reed.
There are different styles of ligatures. My ligature goes with the screw at the bottom, but if you’ve got one of those cloth ligatures, perhaps the screw goes at the top. You’ll be able to see which way it fits.
So slide your ligature onto your mouthpiece, and then once it’s on there, we’re going to slide the ligature up a little bit and then the flat face of the reed, the flat face of the mouthpiece.
Now fit the reed. Slide the thick end of the reed onto the mouthpiece, going underneath the ligature. The flat side of the reed goes against the flat side of the mouthpiece.
What we’re aiming for is to get that reed so that it’s even on both sides of the mouthpiece and also just a fraction below the tip of the mouthpiece.
Once I’ve got the reed in the right position, I hold it in place with my thumb, slide my ligature down, and then tighten my ligature to hold the reed in place.
Don’t tighten the ligature too much. You don’t want to squeeze the life out of it. Really. It just needs to be finger-tight to hold the reed in place and allow the reed to vibrate, so you get a nice sound.
It’s really important to get this right. When you’re a beginner saxophone player, it might take a bit of practice, so don’t worry. Remember :
✅ The flat side of the reed goes against the flat side of the mouthpiece
✅ Your reed sits just below the end of the mouthpiece.
✅ Once the reed is in place, tighten the ligature to hold it there.
Fitting the Mouthpiece
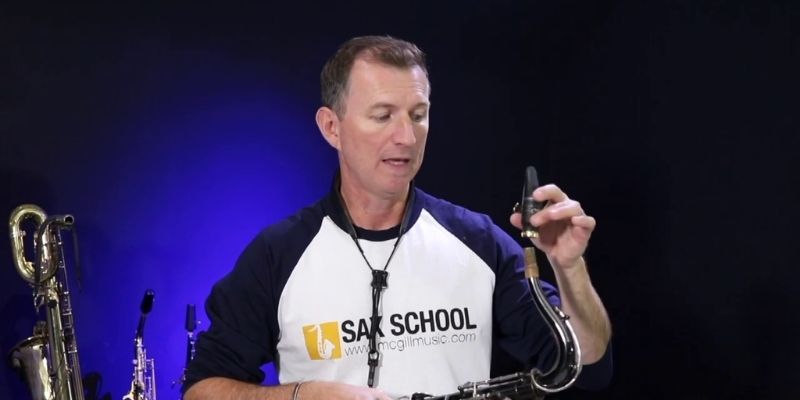
Let’s pop our mouthpieces on our saxophones and start making a sound.
The mouthpiece goes on the end of your neck cork, and you slide it on with a gentle, twisting motion. It might be better to hold the neck of the saxophone to support it. It doesn’t matter if you’re on a tenor or an alto – every saxophone works the same way.
As a guide, you want to have a centimetre to a centimetre and a half of cork showing when your mouthpiece is on.
If you’re struggling to get your mouthpiece on, don’t force it. Just put it on to where it feels comfortable. If it’s super tight and you find that you can only get your mouthpiece on a very short way, you need to go and see your repairer and get that cork adjusted.
Similarly, if it’s lost, you need to go see a repairer. It’s easy and inexpensive to get fixed.
Also, it’s a good idea to get some cork grease. Your saxophone probably came with some – it looks a bit like lip balm. Just put a little bit onto the cork regularly to keep it nice and soft.
So to recap:
✅ Slide the mouthpiece onto the neck of your saxophone till about 1-1.5 centimetres of cork is showing.
✅ Don’t force the mouthpiece. If you find it’s very tight or very loose, you need to see a saxophone repairer to get your cork adjusted.
✅ A little bit of cork grease will keep the cork nice and soft.
Your Posture
Let’s talk about the shape of our mouth and posture when we’re playing the saxophone.
You’ll notice that every saxophone player in the world uses a neck strap. It supports the weight of the saxophone, so all of the weight is on your neck and not on your thumbs.
Whether you’re playing sitting down or standing, the most important thing is that your back is straight. Your shoulders and arms should be relaxed, and there’s no extra tension.
Your right thumb goes under the hook at the back, the bottom of the saxophone and your left thumb goes on the black button up toward the top of the saxophone.
To begin with, just put your thumbs there and just close your hands around the front of the saxophone, but don’t press any keys down.
Your Embouchure

As a beginner saxophone player, getting your embouchure right is really important. So to get a good sound on the mouthpiece and to support the mouthpiece so the reed can vibrate, we need to make a tiny cushion with our bottom lip.
If you think about saying “Vuh,”. Before you say the “uh” part, your bottom lip is naturally over your teeth a little bit, and it forms a little cushion on top of your teeth.
So try making that shape. And then rest the reed on top of that cushion.
Your top teeth make contact with the top of the mouthpiece, and then your lips form a nice round seal around the mouthpiece.
You should have about a centimetre or so of the mouthpiece in your mouth.
So once your embouchure is in the correct position around the mouthpiece, then take a big deep breath and blow out. Try making a long sound.
So to recap, for your embouchure, think about:
✅ Your bottom lip over your teeth
✅ Making a seal around the mouthpiece
✅ How much mouthpiece is in your mouth
Tonguing Technique
The technique that we use to start every note on the saxophone is called tonguing. And all we’re doing is touching the tip of the reed with our tongue. Then we release our tongue to make that note sound. So we’re going “to, to, to” Don’t use your voice, but it’s the same tongue movement as if you said, “to”.
Try putting your mouthpieces in with no fingers down. Put your tongue on the reed and then go “to, to, to” to make a sound. Try that a few times.
Your Fingers
Let’s look at where your fingers go on the saxophone.
Let’s start with the left hand. So remember, your thumb goes on that button at the back of your saxophone. Then, your left finger goes on the pearl keys, going down from the top.
You will notice there’s a small key in between the first and second keys. We don’t use this one. This one is an extra key, which we’ll come to later on. But for now, your index finger is on the first key. You skip the small key. The second finger is on the second key, and the ring finger is on the third key.
It’s easier for the right hand because you’ve only got three pearls down there. So your index finger goes on the first pearl key, the middle finger on the second, and your ring finger on the third.
Now always, when we put our right hand down, we must have our left hand down first. If you think about the saxophone like a long tube, there are holes down the tube, and we close the holes off to make the tube longer.
So as you put down your fingers in turn, you are closing the holes and making the tube longer. So for the right-hand keys to work, the left-hand keys must be closed too.
So the order that our fingers go down on the saxophone is we start with the left-hand index finger, then add the second finger, and then add the third finger. Then we add the right-hand first finger, second thing, and third finger.
Alto and Tenor Saxophones
The interesting thing about saxophones is that they’re all in different keys, which means that that’s tuned differently. So my tenor saxophone is a bigger instrument, and so the notes on the tenor sound different from the notes on the alto.
The notes are called the same names, which is a bit confusing, but they sound different. So one finger down on the tenor sounds different to one finger down on the alto.
Inside Sax School, I’ll always show you tunes with separate beginner saxophone lessons for alto and tenor saxophone. And that way, you can learn it depending, regardless of which saxophone you’re learning.
From beginner saxophone players right through to advanced players, there are lessons on loads of different styles of music in Sax School, so there will be something for you too!
There are four main saxophones – soprano, alto, tenor, and baritone -from smallest to biggest. The soprano is in the same key as the tenor, so it uses the same music. The big baritone saxophone is in the same key as the alto saxophone, so those two use the same music.
Final Thoughts
I hope this beginner saxophone lesson helped you. Now that you have these first saxophone notes and know how to make a good sound, then you can start playing some great tunes to share with your friends and family.

Make sure you grab my free Saxophone Toolkit lesson bundle because it follows on right from this lesson, where we start to learn some cool tunes – click the link above. It’s entirely free, and I want you to have these online saxophone lessons so that you can start making some great progress.