
Want to play above top F on the saxophone? You need the “altissimo” range.
If you’ve been honing your skills on the saxophone and are now looking to take your playing to the next level, you’re in for an exciting journey. One of the most exhilarating techniques advanced saxophone players delve into is playing in the altissimo register.
Don’t be intimidated by the name – altissimo notes are those thrillingly high, soaring tones that seem to defy the instrument’s natural range. Mastering these notes opens up a world of expressive possibilities, allowing you to add impressive and unique elements to your playing.
In this post, I’m going to show you:
- Some tips on getting the altissimo high G on the alto saxophone.
- The reasons to learn altissimo range
- Fingerings on different notes
Why learn the altissimo range?
A lot of people struggle with getting this note because it is the first note of the altissimo alto sax range. But if you can crack that high G, it opens up a whole other range on the saxophone. There’s nearly an octave of notes above it that you can play.
So how can you get started with the altissimo note on the alto and tenor saxophone? There are lots of things you can do by practising overtones and various techniques like that.
But today, I want to show you a little technique for moving with your fingers, to go from one note to the next, to help you get that note out.
Getting Started with Alternate Fingerings
First of all, we’re going to backtrack a little bit, and we’re going to look at the palm keys and use side fingerings for the high notes, D, E, and F. You probably already know these, but this is a good way to get from that note up to the high G.
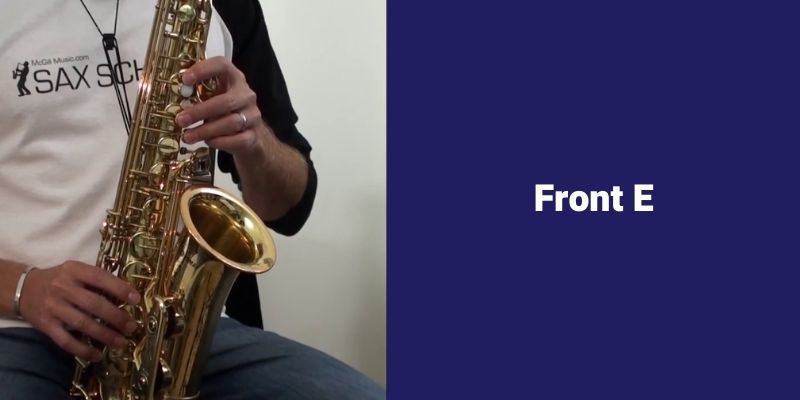
Fingerings of Front E
There’s only one way to play a high D and high E flat where we’ve got the two palm keys. But for high E, we normally use the two side keys and then the top key on the side.

But the alternative way for that is to use the front E, where we’re using the same fingering as if we’re playing high G, with the octave key at the back, but we move our first finger up onto the front F key. So we’ve got our G finger, A finger, and our B finger is up on the F key. We still have the octave key on the back. This fingering is also high E.
If we go between those two, they have slightly different sounds, but that’s a really useful fingering.
Fingerings of Front F
Now, from there, if we lift up our G finger, we will get front F. I’m sure most of you know that already – so instead of playing the 1, 2, 3 on the side, the top key here, and an octave key, which is also F.

So now we know our front E and our front F fingering. Now, if we go back to the front, E-fingering, I’m going to show you how to go from that to high G.
Fingerings of High G
First of all, here’s the fingering for high G. Now, this is a bit of a tricky fingering. You need to take your time working without blowing, just working on your fingers, getting them moving nice and smoothly.
Now, there are multiple fingerings for altissimo high G on saxophone, but this is one of them. We’ve got the first finger and the third finger of the left hand and the octave key. And on the right hand, we’ve got our first finger and a third finger, and the bottom side key – the B flat key, which we’re playing with the side of our finger.

Fingerings of Front E to High G
That’s a bit of a weird fingering, but it’s easier to get that note if we go from the front E fingering. Remember, that’s the G finger, A finger, and the front F and octave key.
Just for a second, without blowing, just try your fingers going from that front E to high G. .You’ll notice here that I’m sort of rolling my B finger.
Playing Altissimo High G on Saxophone
Now, let’s try playing it. Keep everything really firm, especially your embouchure. Keep your throat nice and open like you’re having a yawn. Use lots of air support, so push your air through from the bottom of your lungs, and really try and get a good, steady column of air up into the saxophone.
I’m actually not changing anything inside my mouth when I make the change from E to G. I’m just keeping everything nice, solid, and firm. I’m not biting, and I’m just keeping my mouth, embouchure nice and firm, keeping the throat open, and keeping lots of air blowing out.
The trick with this really is to go very, very slowly. Start by getting a good, solid note on high E, the best sound you can. Try to get a really nice and big open sound. And then, moving all of your fingers together, going up to that high G.
And that’s really the key. You’ve got to move your fingers together. Sometimes, it takes a little bit more practice before you start blowing – just coordinating your fingers.
You can even try playing in front of a mirror or moving your fingers in front of a mirror to make sure you’re moving everything together.
Fingerings of Front F to High A
If you’re feeling comfortable with that one, you might want to try F to A. I’m going to show you that one really quickly.
Remember there are multiple fingerings for these notes, but these are good ones. I’m showing you good, solid fingerings that should definitely work on your horns.
We talked about front F before, using the C finger and our F key. Now, for high A, and
The fingering for high A is the octave at the back, then the A finger and G finger on the left hand, and then all three fingers on the right hand.
Let’s try playing it. Keep everything really nice and firm with lots of air support.
Final Thoughts
If you can conquer those two notes, the high G and then the high A, you’re sorted. You’re well and truly on your way to getting a good, strong altissimo range on your saxophone.
But be patient with it. It does take a bit of time. These are some of the trickier notes to get on alto and tenor saxophone, and most people find it difficult at the start, but with a bit of practice, you’ll be able to do it.
If you want to know more about the altissimo fingering chart for the alto and tenor saxophone, it’s best to check out resources like Sax School Online.
Want more lessons like this?
As a Sax School Member, you’ll have access to hundreds of lessons and courses to help you make massive progress on your saxophone in any style! Find out more and get started today!